
Planning Wireless Smart Home Systems for New Construction
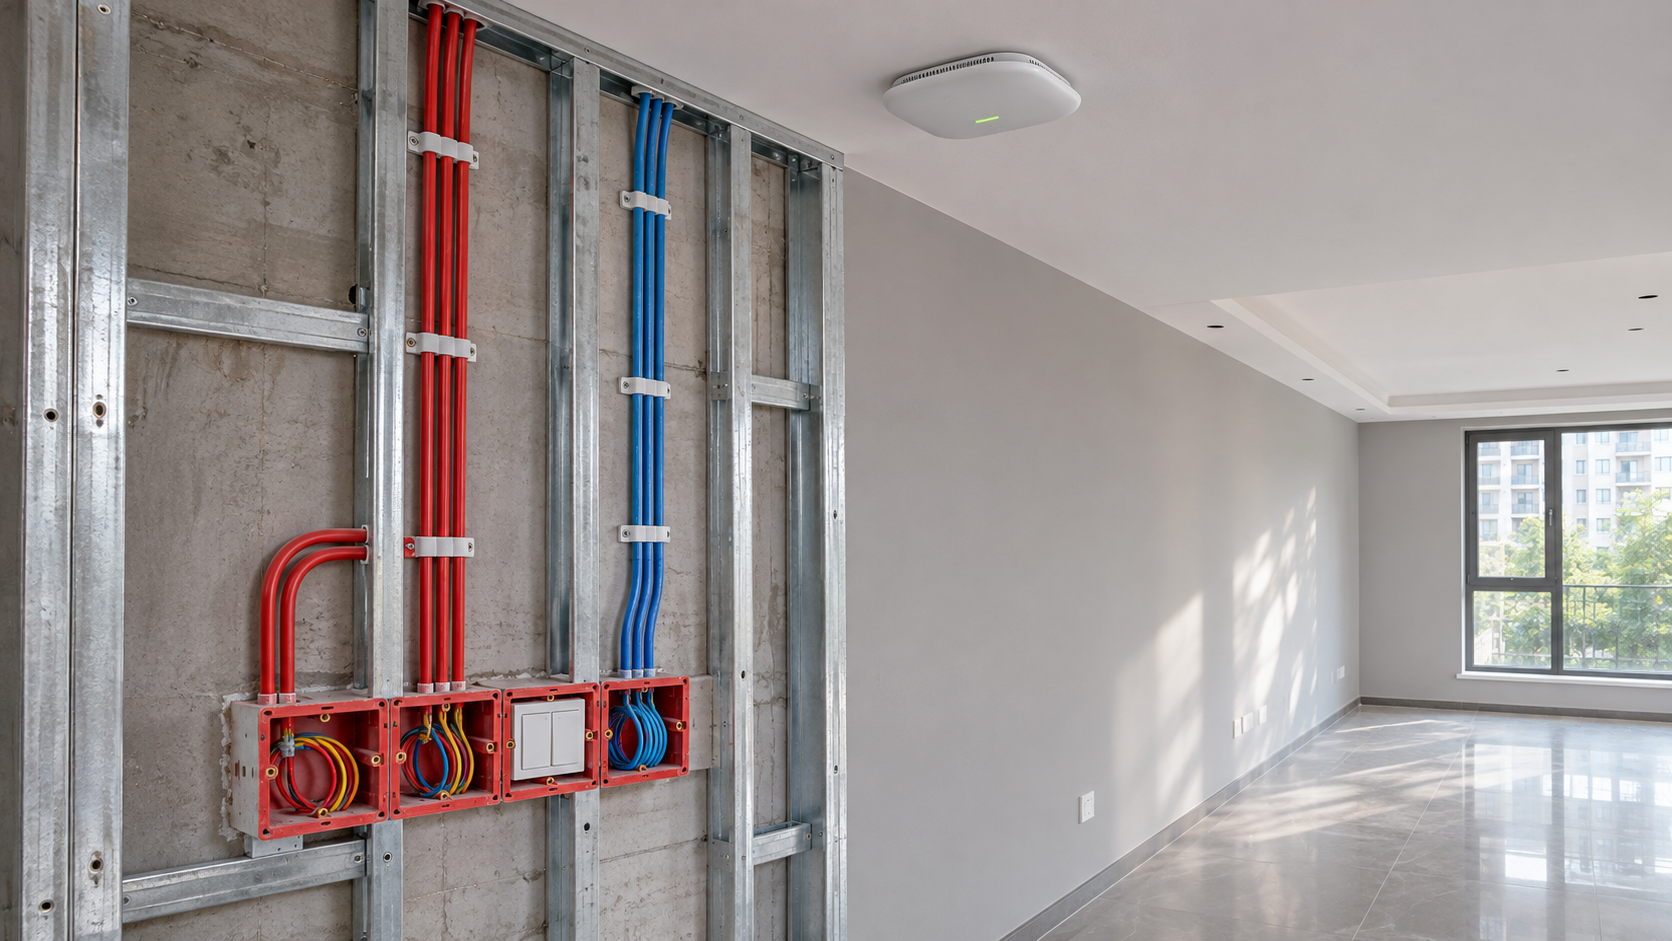
Wireless devices can make a new home easier to adapt, but they do not eliminate the need for early infrastructure planning. A reliable system still depends on power, network access, compatible controls, and clear responsibilities across the construction team. Decisions made before walls are closed determine how easily the finished home can accommodate new devices, recover from outages, and support its occupants.
For smart home construction wireless planning, start with the functions the home must deliver, then design the network and electrical infrastructure around them. Treat wireless as a connection method within the building plan, not as a reason to postpone technology decisions until handover.
Define the functions before choosing devices
Begin with a room-by-room schedule of intended functions. Record which lights, shades, locks, thermostats, water controls, cameras, and appliances are expected to connect, along with the actions occupants should be able to perform. A lighting schedule, for example, should distinguish a simple wireless dimmer from a scene that coordinates several fixtures and shades.
Separate essential functions from conveniences. Occupants should be able to operate primary lighting and heating, unlock doors, and respond to a water leak even when an internet service or automation platform is unavailable. This does not mean every feature must work without a connection; it means the project team should decide in advance what must remain usable and select equipment accordingly.
For each function, document the intended user interface and fallback. A wall switch, physical key, manual valve, or local control may be appropriate depending on the device. Include accessibility, guest use, and maintenance access in the discussion: a home that works only through one resident’s phone is difficult to hand over as a finished building system.
Use the resulting schedule to identify dependencies. An automated shade may need power at the window, a reachable control, a compatible motor, and a network connection or hub. A leak sensor may also depend on a shutoff valve, an actuator, and a defined notification path. Listing these relationships early gives each trade a clear scope.
Choose a connectivity approach that fits the building
Most wireless smart homes use more than one type of connection. Wi-Fi commonly serves devices that need direct access to the home network, such as cameras and some appliances. Other devices use protocols such as Zigbee, Z-Wave, or Thread, often through a hub, controller, or border router. Bluetooth may be used for nearby control or device setup. Each approach has different infrastructure and compatibility needs.
A mesh network can extend coverage by passing messages between suitable devices, but not every product acts as a relay. Battery-powered sensors, in particular, should not automatically be counted on to strengthen a mesh. The placement and availability of compatible powered devices can affect the path between a sensor and its controller.
Matter can simplify integration among supported products and platforms, but a Matter label does not guarantee that every feature of every device will be available in every app. The project specification should identify the intended controller, connection method, and required functions for each device. For Thread-based products, include the appropriate border router in the design and check how it fits with the selected platform.
A mixed system is often reasonable: use the connection that suits each function, provided the integration and support arrangements are understood. Avoid selecting products independently on the assumption that a shared wireless label means they will work together. Ask suppliers to demonstrate the required functions within the proposed system, including any bridge, subscription, or cloud service involved.
Design coverage for the finished home
A floor plan is the starting point for network design, not proof of coverage. Concrete, masonry, metal framing, foil-backed insulation, large mirrors, tile assemblies, and mechanical equipment can weaken or redirect wireless signals. A router placed at one end of a house may appear adequate during framing but struggle after finishes and furnishings are installed.
Plan access point locations with the network designer and electrical team. Central, open positions are generally more useful than a device hidden inside a metal cabinet or crowded utility enclosure. Multi-storey homes, detached structures, outdoor entertainment areas, and mechanical rooms may need separate attention. Wired connections to access points provide a dependable backbone and leave wireless capacity for devices that cannot be wired.
Do not judge the design only by phone reception in living areas. Test at the planned device locations: a lock is at a door, a water sensor may sit inside a vanity cabinet, and a controller may be beside equipment in a plant room. Exterior cameras and gate devices also face the building envelope, which can obstruct signals.
Coverage should be assessed again after the main building finishes and fixed cabinetry are installed. Leave time in the programme to adjust access point positions or add equipment before final acceptance. A provisional location on the drawings is useful, but the completed building determines whether it works.
Plan power and cabling even when controls are wireless
Wireless describes how a device communicates; it does not necessarily describe how it receives power. Switches, relays, thermostats, cameras, motorised shades, hubs, and access points may need mains power, low-voltage power, or a suitable power supply. Battery devices remove some cabling, but introduce battery replacement and access requirements.
Coordinate the device schedule with electrical drawings before rough-in. Confirm the wiring and back-box space required by the selected switches and controls, including whether a neutral conductor is needed at a switch location. Provide accessible outlets or other specified power connections for hubs and network equipment. At windows, coordinate motor power and cable routes with the shade supplier before trims and finishes are complete.
Consider wired connections where reliability, bandwidth, or device location makes them practical. Network cables to access points and cameras, for example, can reduce dependence on wireless coverage; some equipment can also receive power over the network cable when supported by the design. Conduit or other accessible pathways to likely equipment locations can make future upgrades less disruptive, even if the initial installation is mainly wireless.
Battery-powered sensors are useful in locations where wiring would be intrusive, such as beneath sinks or near appliances. Place them where they can be reached and tested without dismantling cabinetry. For a water shutoff system, coordinate the sensor locations with the plumbing layout and make sure the valve and actuator remain accessible for service.
Make the control and ownership model explicit
Compatibility is only one part of integration. Someone must configure the system, maintain accounts, and support the homeowner after the project is complete. Decide whether the home will use a central platform, several independent manufacturer apps, or a combination. A central interface may make routines easier to use, but it can also create dependence on a particular controller or service.
Ask how each important function behaves when the internet is down, the hub loses power, or the manufacturer’s cloud service is unavailable. Some automations can operate locally; others depend on an external service. Document the expected behaviour for the actual devices and configuration, rather than assuming that all products using the same protocol respond alike.
Account ownership deserves the same attention as equipment ownership. The handover plan should identify the homeowner’s administrative access, any installer access, and the process for removing temporary project accounts. Avoid leaving shared passwords in the building documentation. Where supported, use individual accounts, strong unique credentials, and multi-factor authentication for remote access.
Place smart devices on a suitably managed network and agree on who can change its settings. A separate network for connected devices may be useful, but it must still allow the communication required by controllers and apps. The network installer and smart-home integrator should test that arrangement together; isolation that prevents an essential device from working is not a finished design.
Coordinate the work around construction milestones
The largest avoidable delays often arise at the boundaries between trades. A technology supplier may specify a powered shade after the electrical rough-in is complete, or the electrician may install a switch box that cannot accommodate the selected control. Include the smart-home scope in ordinary design reviews and change control, rather than treating it as a separate package added near completion.
- During design: agree on the room schedule, essential functions, preliminary platform, device locations, and responsibility for integration. Identify equipment requiring power, data cabling, plumbing work, or physical access.
- Before rough-in: coordinate electrical, network, security, HVAC, shading, and plumbing drawings. Reserve pathways and equipment space, and resolve product-dependent wiring requirements.
- Before walls are closed: inspect installed cabling, boxes, power points, and accessible pathways against the approved schedule. Record their locations for later installation and maintenance.
- After finishes: install and configure devices, assess coverage at their final positions, and test the agreed functions as a complete system.
- At handover: demonstrate operation, provide documentation and account access, and identify who handles faults, updates, and outstanding items.
Assign an owner to each interface. If a leak sensor should close a water valve, for example, the plumbing contractor may install the valve while an integrator configures the control. The acceptance test should cover the whole sequence, not just confirm that the sensor appears in an app.
Budget for operation, not just installation
A device list alone rarely represents the full cost of a connected home. Allow for network equipment, hubs, power supplies, cabling, configuration, commissioning, and training. Some functions may also require recurring services, such as cloud video storage or remote monitoring. Identify which features depend on those services and who will pay for them after occupancy.
For phased projects, prioritise infrastructure that is difficult to add later: cable routes, power at window and ceiling locations, space for network equipment, and access to valves or controllers. Decorative devices and optional automations can often be added later, provided the underlying system has enough capacity and suitable compatibility.
Also define the support period and the boundary between construction defects and ongoing technology maintenance. Software updates, battery replacement, account changes, and internet service interruptions do not all fall naturally within one contractor’s scope. Clear responsibilities help prevent a minor fault from becoming a dispute between suppliers.
Test the home as occupants will use it
Commissioning should prove that the agreed functions work in the finished building. Operate controls from their normal locations, test devices inside cabinets and at exterior doors, and check that notifications reach the intended users. Verify scenes and schedules using the actual combinations of lights, shades, thermostats, and other equipment specified for the project.
Include practical failure scenarios in the acceptance plan. Disconnect the internet and observe which local controls and automations continue to work. Where safe and appropriate, test recovery after power is restored. Check the operation of manual overrides and confirm that occupants know how to use them. Test water shutoff functions in coordination with the plumbing team so that the result can be observed without causing avoidable disruption.
Handover should include an up-to-date device schedule, network and equipment locations, relevant product documentation, maintenance instructions, and a record of the agreed support contacts. Walk the homeowner through ordinary tasks as well as recovery steps. A successful installation is one the occupants can operate and maintain after the construction team has left.
Industry Briefing
Get the top 5 industry headlines delivered to your inbox every morning.